When you’re thinking about a main course to bring to a party, steak is probably not high up on your list. Can you imagine what it would cost to bring rib-eye to feed a crowd?
But then there’s tri-tip. It’s an affordable cut of meat, like brisket, because it needs a certain amount of attention to keep it from turning into an unchewable brick. And fortunately, tri-tip is way easier and quicker to cook correctly than brisket — if you know some key techniques. (Nothing against brisket, by the way; done right, it’s the absolute best — it just requires some special equipment and a lot of time.)
Cooking tri-tip perfectly began in the Central Coast region of California. Traditionally it’s grilled on a special contraption that hangs above a wood fire, a floating rack that can be raised or lowered as needed. You can still reap the benefits on a charcoal or gas grill, but it’s even easier and amazing to do it in a two-step process right in your kitchen.
It’s taken a long time for tri-tip as a cut to make its way into butcher counters around the country, because for the longest time no one really knew what to do with it. Now it’s more widely available, ready for you to dazzle guests with some of the most flavorful, tender beef they’ve had in a while — and probably never at a party. The best part? Even when you cook it to a perfect medium rare, there will still be medium and well pieces closer to the ends, so people who like different levels of doneness will all have something to enjoy.
The keys to juicy, tender tri-tip are selection, seasoning, cooking technique, and slicing. First, choose a large (2 1/2-pound) cut that has a lot of marbling of fat. You’ll dry-brine the meat with a combination of salt, pepper, and garlic powder (plus other dried seasonings if you like, but you really don’t need more than these first three). Then after a sear in a hot pan on the stove, the meat finishes in the oven, done in under 30 minutes. Finally, after a rest so the juices can redistribute and the meat can finish cooking off the heat, there’s a secret to slicing just right to get the tenderest slices, and here it is:

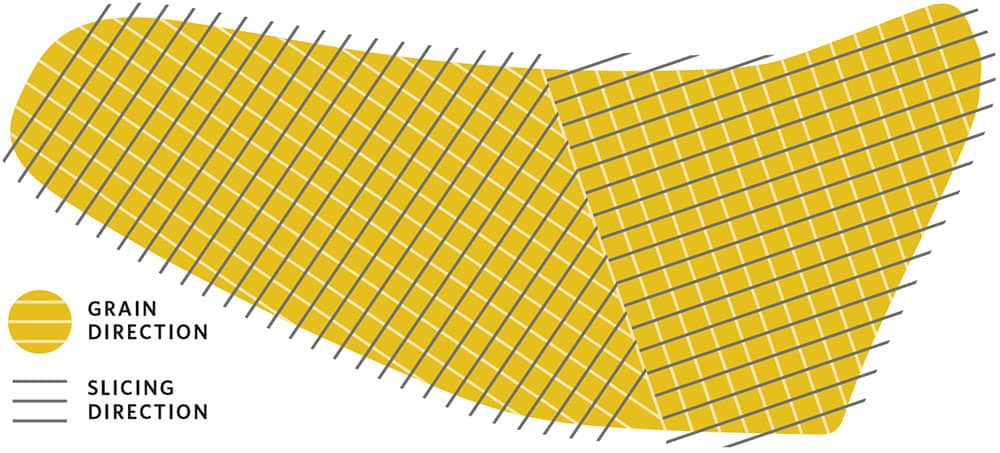
Slicing tri-tip: the unusual thing about a tri-tip is that the grain changes direction somewhere around the middle of the cut. But like with any meat, slicing against the grain is important, so you need to divide the meat where the grain changes direction and slice against the grain on each piece. For maximum tenderness, cut on the bias (rather than cutting straight down, cut through at a slight angle).
Finally, a seasoning/cooking note: make sure to adjust seasoning and cooking times based on the size of the tri-tip you get. A two-pound cut will finish in the oven much faster than a 2 1/2-pound cut. Every cut is different, so pay attention to what yours needs.
Ingredients
- 2.5 lbs tri-tip steak
- 1 Tbsp kosher salt
- 1 tsp ground black pepper
- 1 tsp garlic powder
- 3 Tbsp olive oil
- 1 cup pesto (optional)
Instructions
- Sprinkle salt, black pepper, and garlic powder all over the tri-tip: top, bottom, and sides. Let rest in the refrigerator for one hour, then take out and let it come to room temperature for another hour.
- Preheat oven to 350°F. While it's preheating, line a rimmed baking sheet with foil and place it on a rack in the middle of the oven.
- Heat olive oil in a large skillet until hot, then place the tri-tip in the skillet. Sear until browned, about 4 minutes on the first side. Use a hamburger press or pot lid to push the meat into the pan to get an even sear.
- Lift the tri-tip out of the pan, swirl the oil and juices to coat the pan again, then flip the tri-tip and sear, pressing down as before, until browned, about 3 minutes.
- Remove the tri-tip from the skillet and place on the prepared pan in the oven. Roast for about 6-8 minutes per side, until an instant-read thermometer inserted into the thickest part reads 125-130° for medium rare. Remove from the oven and wrap with foil to rest for at least 20 minutes before slicing.
- Try to wait until the last minute to slice the tri-tip. If you're bringing it to a party, see if you'll be able to slice it there. You can keep the tri-tip warm, wrapped in its foil and stored with towels in a dry cooler, for an hour or so.
- See the note and diagram above about slicing.
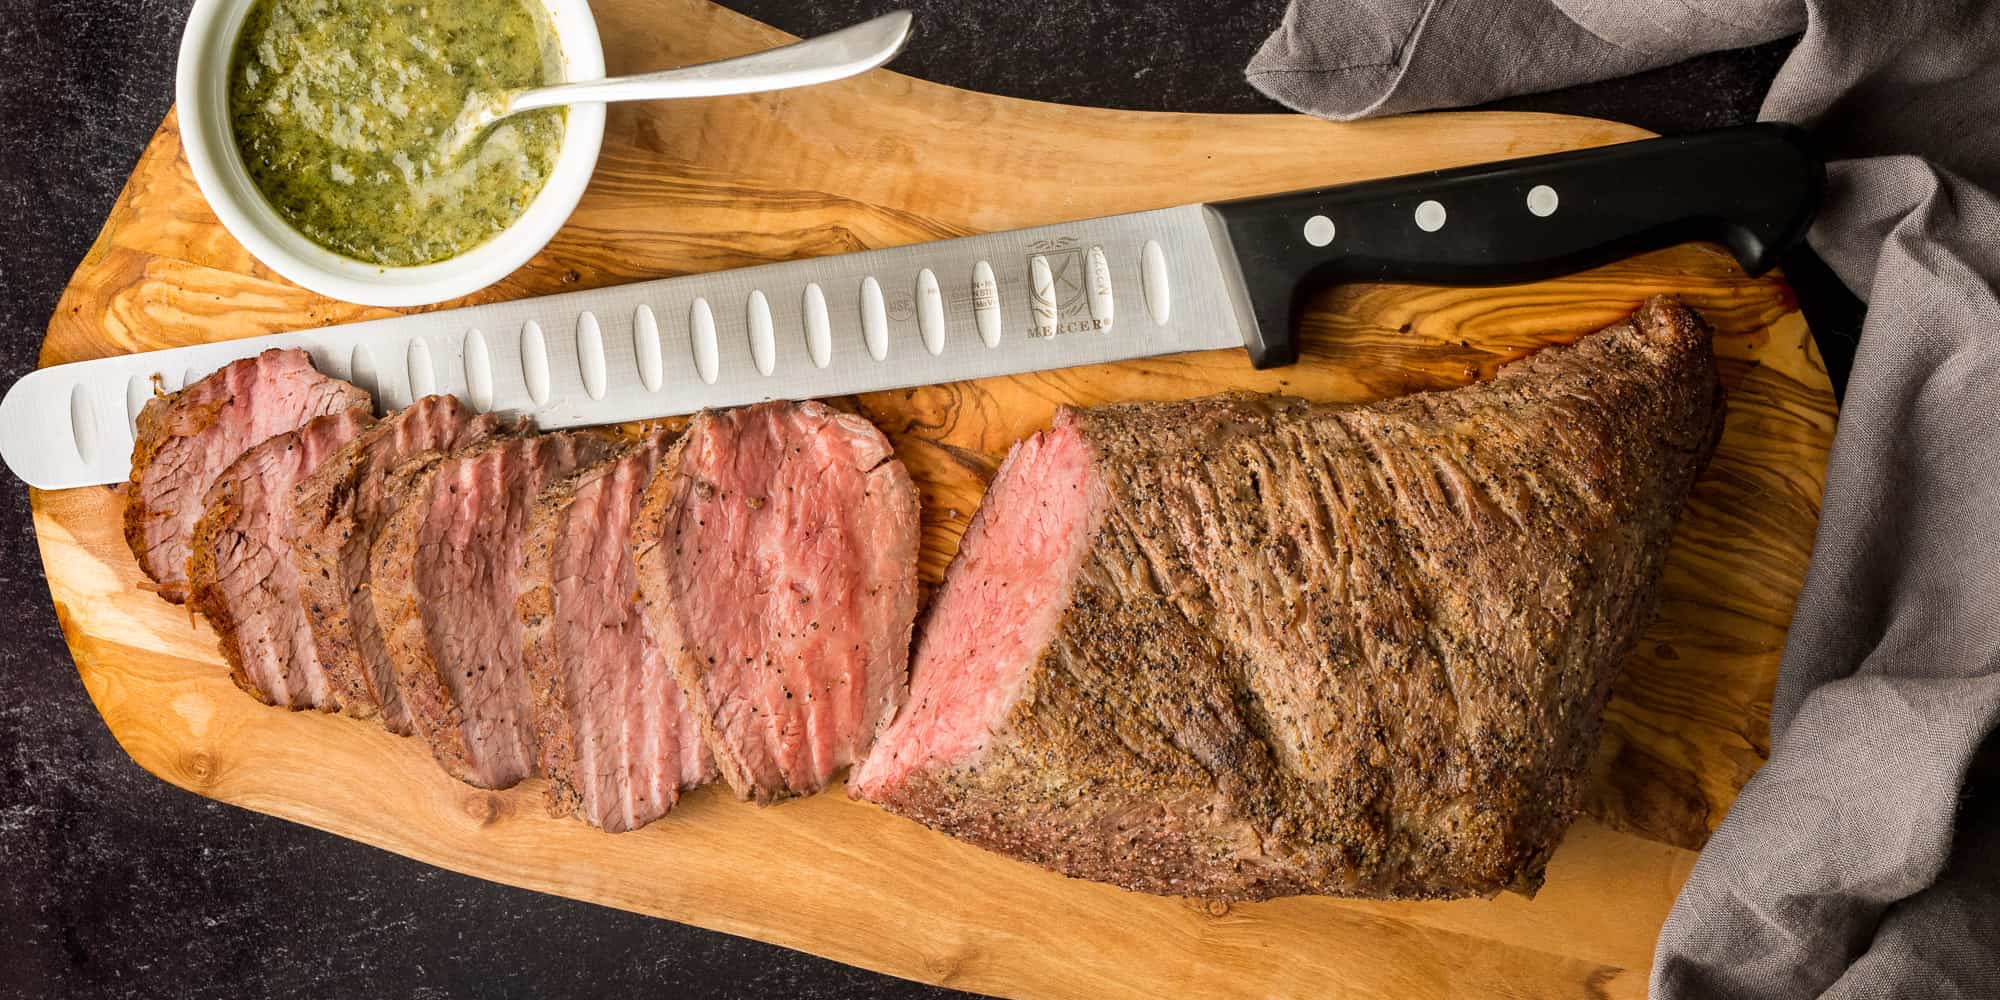
- When you're ready to slice the meat, remove the tri-tip from the foil, reserving any juice. Find where the grain changes direction, somewhere near the middle, and cut the tri-tip apart at that point. Then cut 1/4" slices against the grain on each part, cutting on the bias (i.e., at a slight diagonal).
- Plate the slices and drizzle the reserved juice over the slices. It's great just on its own, or you could also serve some pesto or another favorite sauce to go with it.


