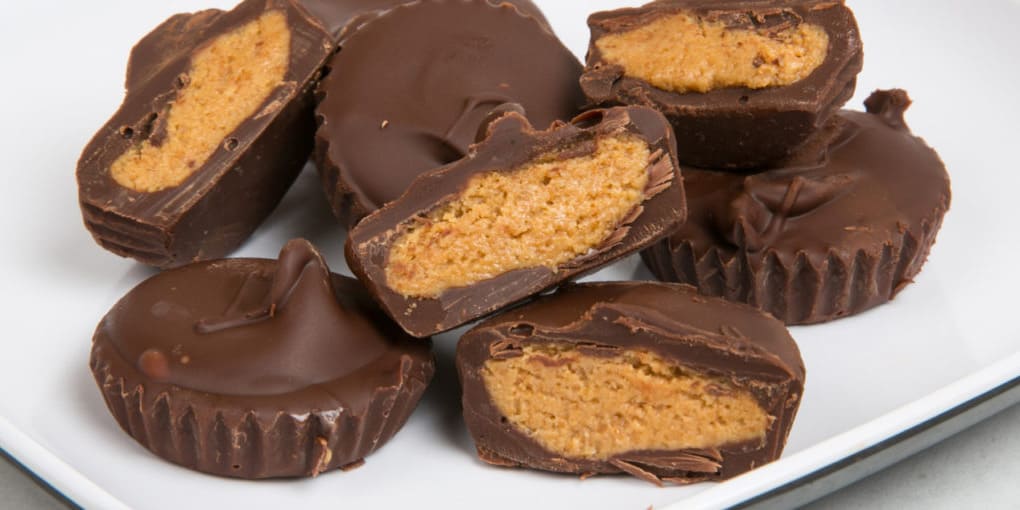
Making peanut butter cups from scratch will blow everyone away at the party. Not only will they taste better than Reese’s (and we love Reese’s!), but everyone will come up to you and demand to know how you got the peanut butter inside.
Here’s the thing: that part is dead easy. The hard part is getting the filling consistency right, and that all comes down to what kind of peanut butter you use. If you use a standard peanut butter spread like Skippy or even something fancier but still a “no-stir” variety because it has palm oil keeping it together, it’s easy to just follow this recipe and you should be fine.
If you’re using an all-natural peanut butter that separates and is therefore kind of soupy even after stirring it, you can go a couple of different directions: either a) freeze it for a while before using it to harden it up somewhat or b) see the notes about adjusting ingredient amounts in the recipe.
The only other specialized need is to have a mini-muffin pan, ideally one that makes 24 mini-muffins. (Even more ideally and to save yourself time, it would be good to have two such pans, but you can certainly do this with one pan.) You’ll also need mini-muffin cups. Heavier-duty ones like silver or gold foil work best, but you can also use more festively printed paper cups; the melted chocolate may obscure the design a bit, though.
Use good-quality semi-sweet or dark chocolate for these. We use Guittard semi-sweet chips.
Keep chilled until serving, especially if you’re bringing these to a picnic on a hot day. Serve either in the cups or out of them; they look beautiful either way. Especially if it’s warm where the party is happening, leave the cups in the liners; the chocolate isn’t tempered, so it will melt easily on the hands. But there are worse problems in the world than chocolatey fingers.
Ingredients
- 3 12 oz bags semi-sweet chocolate chips
- 9 crackers graham crackers
- 1 cup peanut butter
- 1 cup confectioner's sugar
- 1/2 tsp salt or to taste—see note below
- 3 tablespoons unsalted butter
Instructions
First steps
- Line a 24-count mini-muffin pan with paper or foil cups. If you have two pans, use both. Set aside.
- Melt the chocolate chips in a double-boiler or a bowl set over a pot with simmering water while you prepare the filling. When the chocolate is melted, turn off the stove but keep the chocolate over the still-hot water to keep it melted.
Prepare the filling
- In a food processor, grind up the graham crackers to a fine meal.
- Transfer the ground graham crackers to the bowl of a stand mixer fitted with the paddle attachment. Add the rest of the ingredients and beat until combined into a doughy consistency. It should neither be crumbly (too dry) or gloppy (too wet) — you should be able to form a tiny disc and have it hold together well and not spread out. If it's crumbly, add a bit more peanut butter; if it's gloppy (likely because the peanut butter is of the natural variety), you can either try freezing the filling for a little while to firm it up or add confectioner's sugar (1/4 cup at a time) and/or butter (1 tablespoon at a time) to try to get the consistency right.
- Optional: you can add salt to taste. Sometimes it works well to have the filling be slightly on the salty side; the chocolate will compensate for it.
- Scoop 1 teaspoon of dough and roll it into a ball, then flatten slightly to form a fat disc about 3/4" in diameter and about 1/4" high. Repeat until you have 60 discs of filling.
Filling and chilling
- Get the lined mini-muffin pan and the melted chocolate. Using a spoon, ladle some of the melted chocolate into each liner. You don't have to be precise about how much chocolate you're putting into the liner at this point — it should be about a tablespoon, enough to cover the bottom of the cup by 1/4" or so.
- Once all the cup bottoms have chocolate, place a filling disc into each one, slightly pressing down so that it squeezes some of the melted chocolate upward. The disc should show a thin moat of chocolate all around — it should not touch the sides of the cup.
- When the pan is filled with the discs, ladle a little more melted chocolate over each one so that the filling is just covered. Smooth over each one with the back of a small spoon.
- After all the cups are completely assembled, chill in the freezer for about 10 minutes until hard. If you're reusing the pan, you can pop the cups out and keep them chilled in the refrigerator (not freezer) until it's time to bring them to the party, and immediately re-line and reuse the pan.